Hey guys, today I am going to show you that how to install mac os x el capitan on virtualBox. Let me tell you guys if you were searching for how to install mac os x capitan on PC without mac? or how to install mac os x el capitan on virtualbox? then you are at the right place.
I’ll divide the sections of this tutorial into simple steps so it would be easy for you to learn how to install mac os x el capitan on pc.
Download Links For Mac OS X El Capitan
First of all, you would need the download files through which you will be installing mac capitan on your PC via the virtual box. So, download all of the files first before getting ahead.
Hardware requirements to run Mac OS X El Capitan on Virtual Box.
- 3072 MB Of Memory or RAM.
- Virtualization should be enabled in bios. You can enable virtualization by entering onto your bios by pressing ” Esc “, ” del ” key on your computer and enable virtualization in the bios, save it and exit.
- Enable virtualization technology in BIOS (VT-x)
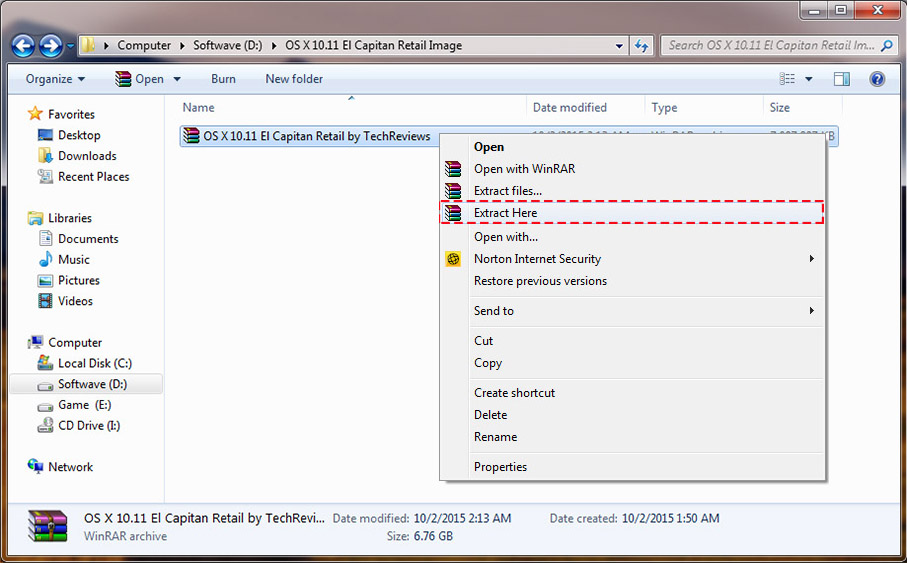
Step 1: Extract OS X El Capitan File With WinRar
Extract the os x el capitan image file by going on to the folder on which you have downloaded in, right click on it and tap on extract file. If you don’t have any zip file viewer, I prefer you to go for WinRar and after downloading and installing it, you can simply extract mac os x el capitan image file.
Step 2: Install VirtualBox
Now, install virtual box on your PC by downloading it from the given link and installing it on C drive by tapping next, next and finally click on tapping next until and unless you reach the final installation screen.
Step 3: Create Virtual Machine
Click on create new virtual machine and follow and type your desired name for example lets take OS X EL Capitan, on the type section select Mac OS X, in the version select Mac OS X 10.11 El Capitan (64 bit) and tap on next.
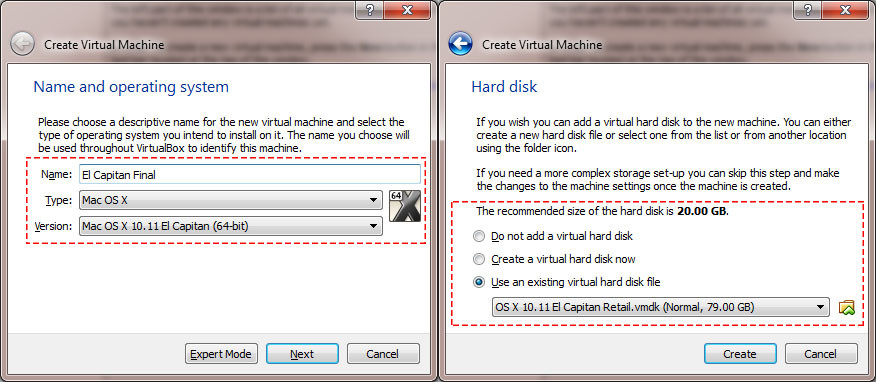
And finally, click create.
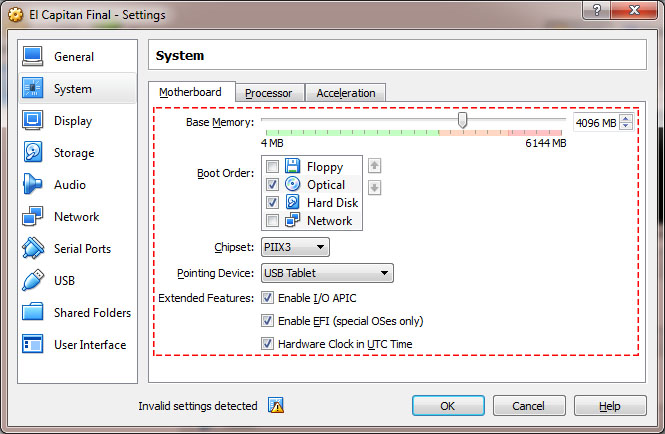
Step 4: Edit Your Virtual Mac
Now it comes to editing some configuration of your virtual machine that you created according to your hardware relevancy.
Leave CPU as it is or you can increase it if you i5 or i7 quad-core processor and you can increase the number of processors to 3-4.
PAE/NX should be enabled.
After it directly comes to system and Disable Floppy, PIIX3 or IHC9 and enable EFI.
Step 5: Adding some essential codes
In this step we will add some codes which are essential to install Mac OS X El Capitan on virtual box, these codes are required to patch SMC and smbios of the virtual machine.
Open the command prompt by running it as administrator, search cmd in the search bar and open it by right clicking and tapping on run as administrator.
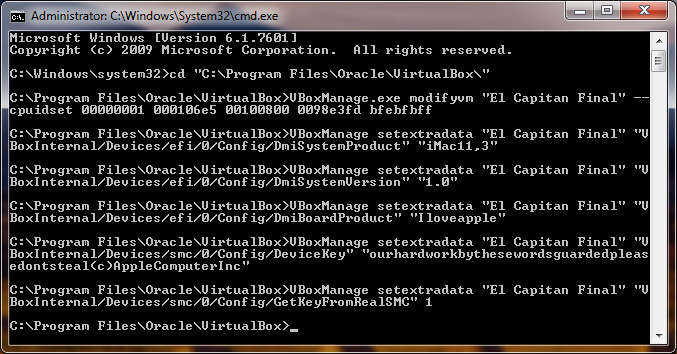
Replace ” Your VM Name ” by your mac os x capitan virtual machine name. Paste the below code on cmd and press enter.
cd "C:\Program Files\Oracle\VirtualBox\"
VBoxManage.exe modifyvm "Your VM Name" --cpuidset 00000001 000306a9 04100800 7fbae3ff bfebfbff
VBoxManage setextradata "Your VM Name" "VBoxInternal/Devices/efi/0/Config/DmiSystemProduct" "MacBookPro11,3"
VBoxManage setextradata "Your VM Name" "VBoxInternal/Devices/efi/0/Config/DmiSystemVersion" "1.0"
VBoxManage setextradata "Your VM Name" "VBoxInternal/Devices/efi/0/Config/DmiBoardProduct" "Iloveapple"
VBoxManage setextradata "Your VM Name" "VBoxInternal/Devices/smc/0/Config/DeviceKey" "ourhardworkbythesewordsguardedpleasedontsteal(c)AppleComputerInc"
VBoxManage setextradata "Your VM Name" "VBoxInternal/Devices/smc/0/Config/GetKeyFromRealSMC" 1
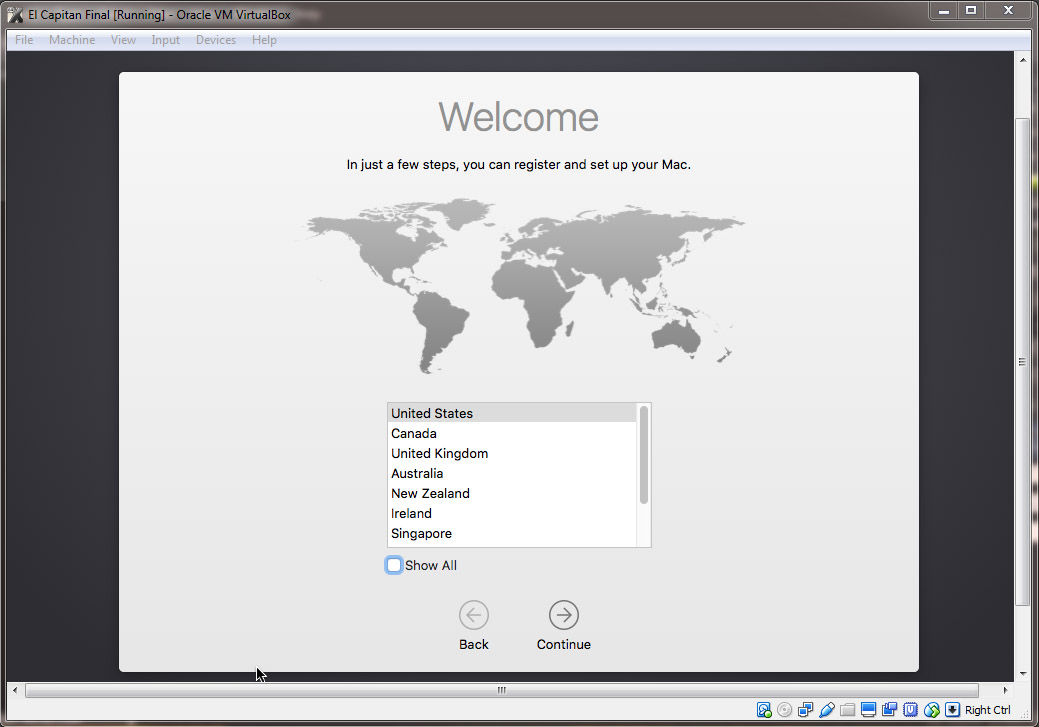
Step 6: Ready To Rock !
Now, your virtual machine would be able to start up and will be ready to rock.
After reaching to the installation screen and follow the on-screen instructions.
Here’s also a good video tutorial by WikiGain, for better understanding
Also Read.
- How To Get Reliance Jio Sim For Any 4G Device [ OFFICIAL METHOD ]
- How To Get FREE Jionet 4G Sim Card [ Unlimited Data, SMS and Calls ]
- Uncountable SEO Tips and Tricks: Which Actually Increases Website Traffic
- Guide to checking for QuadRooter vulnerability and preventing Virus attacks on Android devices
Leave a Reply